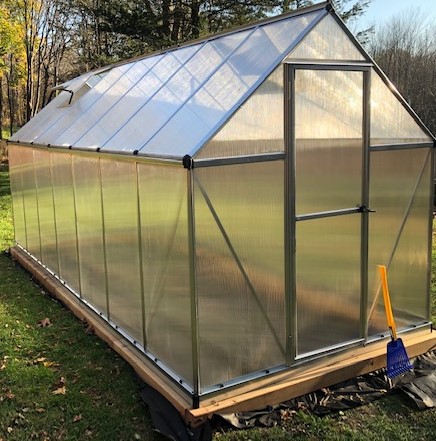
We have always dreamed about having a greenhouse. Build it out of wood and PVC pipe? I’d like to, but I’m not there yet. So, as a first time go at it, I decided to get a greenhouse kit, which included aluminum, plastic parts, and polycarbonate panels for assembly. We went with the Palram Mythos 6 x 14. At this time, it sold for around $1,000. Not too big, not too small, and most importantly – “not a permanent structure”!
After a bit of research, I learned that a sturdy wood or concrete base is highly recommended. I have seen YouTube videos where people put up that same greenhouse without a base and it seemed functional. Without a base, you would need to make sure to anchor the greenhouse to the ground to prevent it from moving in inclement weather. Also, the ground must be perfectly level to avoid assembly issues.
For my base, I used 4″x 4″ untreated cedar. Cedar is a naturally rot-resistant wood, which makes it a great choice for outdoor projects. Of course, it will rot after a few years, so I’ll need to replace the base eventually. I hear pressure treated wood is fine too because they no longer use arsenic, but I didn’t want to take the chance.
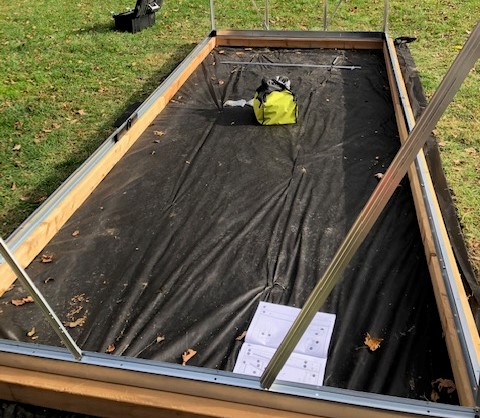
For site preparation and base construction, I used this tutorial from ACF Greenhouses for general reference and modified as needed. Before constructing the wood base, I leveled out a roughly 8’ x 16’ area using a hand-tiller (to remove the grass), hard rake, and tamper. Next, I laid down a weed barrier where I planned to put the base. I cut the cedar wood to fit a 6’ x 14’ greenhouse by making a couple of 45° angle cuts to connect pieces in the middle where needed. The corners of the base were connected using a ratchet wrench and 8” lag screws. Plenty of mistakes were made along the way!
Time to assemble the greenhouse! Warning: there is (at the time I am writing this) a typo on the front page of the Palram Mythos instruction manual where it indicates greenhouse dimensions in inches for the 6’ x 14’ model (the inches do not equal the feet specified). You can imagine the rage when I thought I had to redo the base and the relief when I realized they had made a boo-boo.

It took about 15 hours to put up the greenhouse by myself, but I’m not very swift. If assembling by yourself, I find the hardest part is getting the long sides of the greenhouse to stay upright until the cross-bar is installed at the top to secure each side. I used a wheel-barrow and some chairs on the outside and inside of each side to hold it up until I installed the cross-bars. Generally, the greenhouse assembly for this model is pretty good, no major headaches.


I had also purchased an anchor kit to secure the greenhouse to the ground, but I realized I did not need it, so I returned it. Instead, I secured the greenhouse to the wood base with wood screws. Shortly after, we had 45 mph winds overnight and it did not budge. I only had to re-adjust one of the roof panels that became slightly displaced.
We then got 13 inches of snow, including a 2-inch-thick layer of ice. The greenhouse held up nicely through it all. I went out to clean the snow off the roof a few times just in case, and to let light in, but the ice remained until it melted. I plan to use the greenhouse to get a head start on sowing seeds for spring and to grow cold hardy crops like kale and spinach for late fall and winter harvest!
