Always Wandering Garden

Gardening, plants

In the previous post, I described some vegetable gardening failures at our previous residence – a “hail mary” project doomed from the start due to lack of light. We were fortunate to move to a new house with some sunny areas on the property. Today, there are some new failures, but there is more success today than failure. I don’t think it is possible to be a gardener and not experience failure, but that is also what makes success more enjoyable once we attain it. The space I chose to plant a new vegetable garden was once used as a volleyball court by the previous owner, so it was already nice and level.

Still, I had 2 main issues to contend with – deer and weeds. Now, don’t get me wrong, I love all plants, but I don’t want certain ones crowding out my cucumbers, if you know what I mean. Deer are cute too, but I don’t want them eating the fruits of my labor. Sorry, but y’all gotta go! 

Here’s how it went:

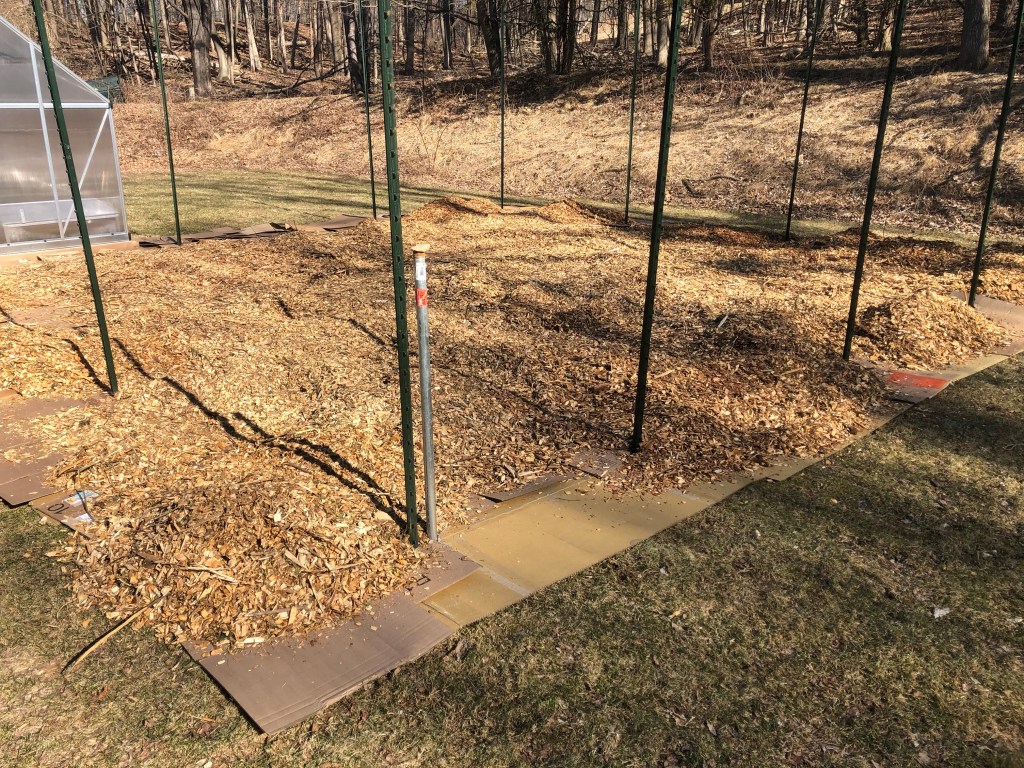
To prevent most weeds, I put a layer of cardboard down to smother out the sod grass. Next, I put wood chips down over the cardboard to create a weed-free-lawn-free-soft-to-walk-on space on which to garden. Now we have a space that doesn’t need to be maintained at all – no mowing no weeding, no nothing. And, it smells great thanks to the decomposing wood chips, if you like that sort of thing. The wood chips also add organic matter as they break down.

Cardboard and wood chips!

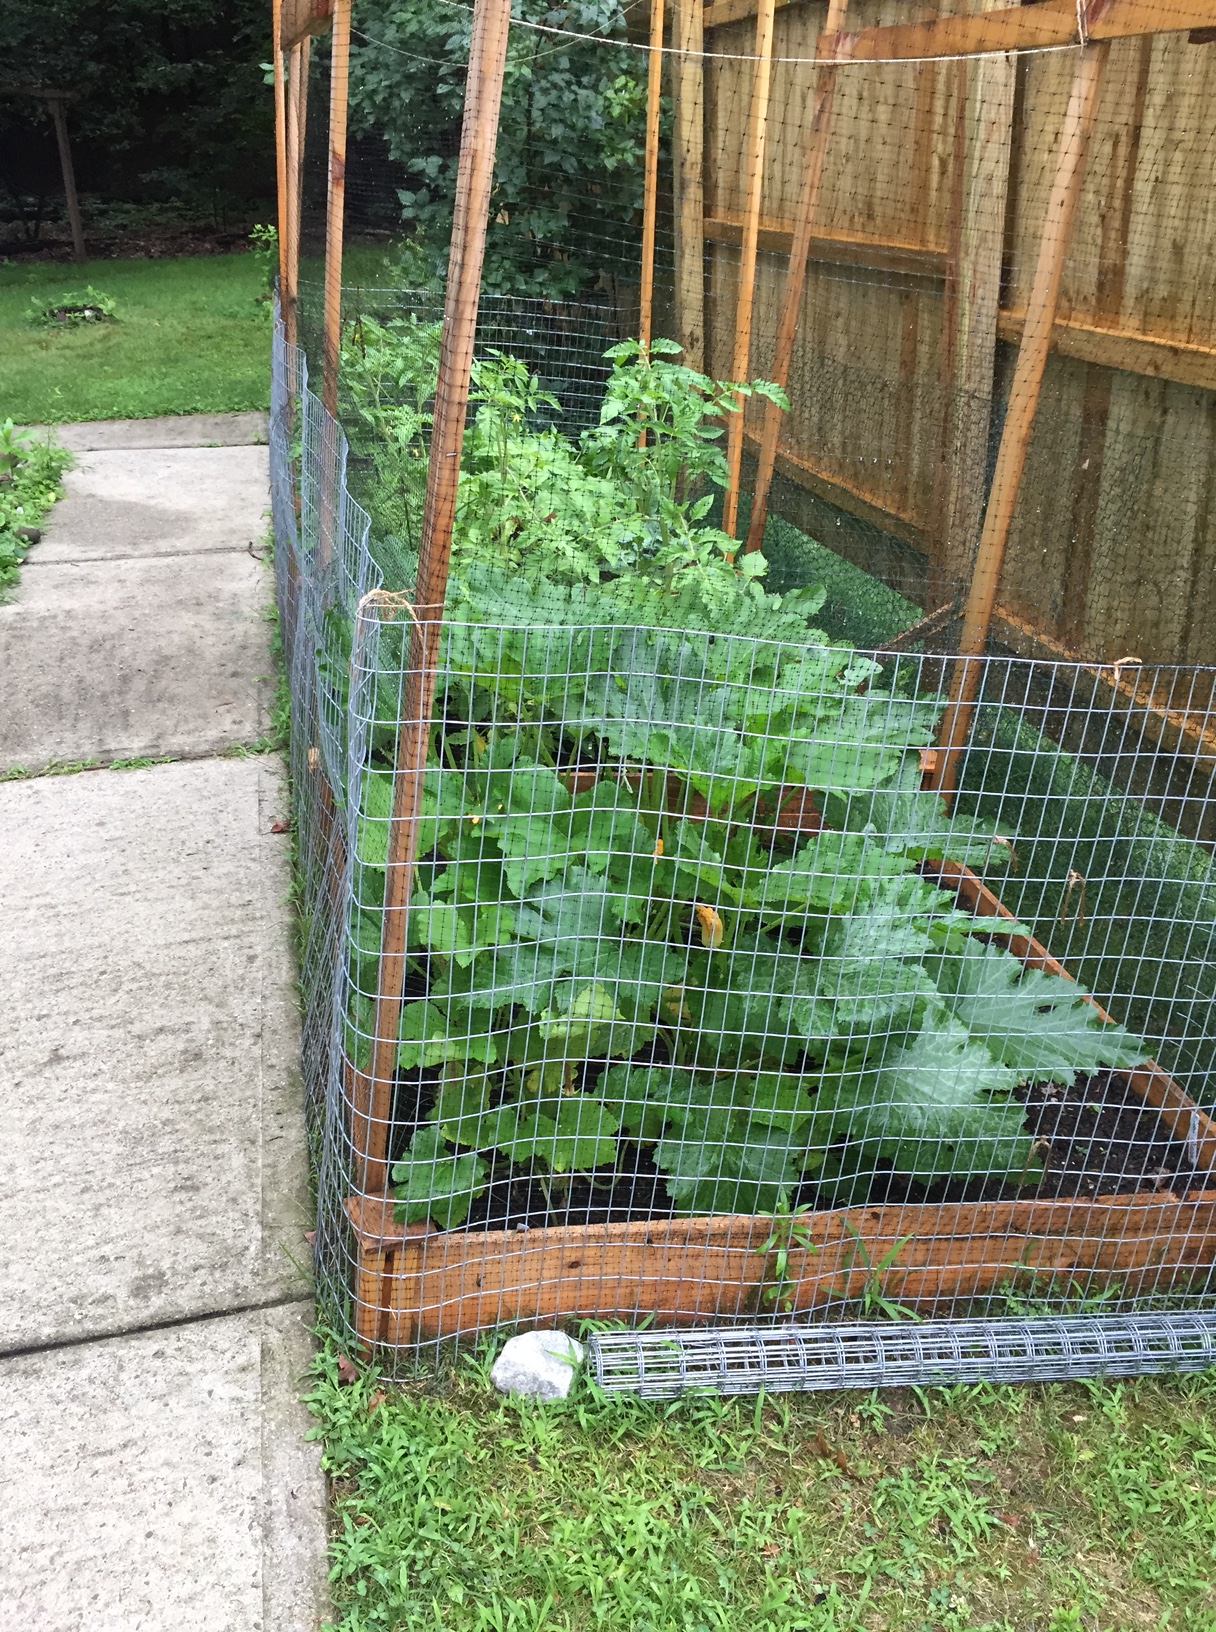
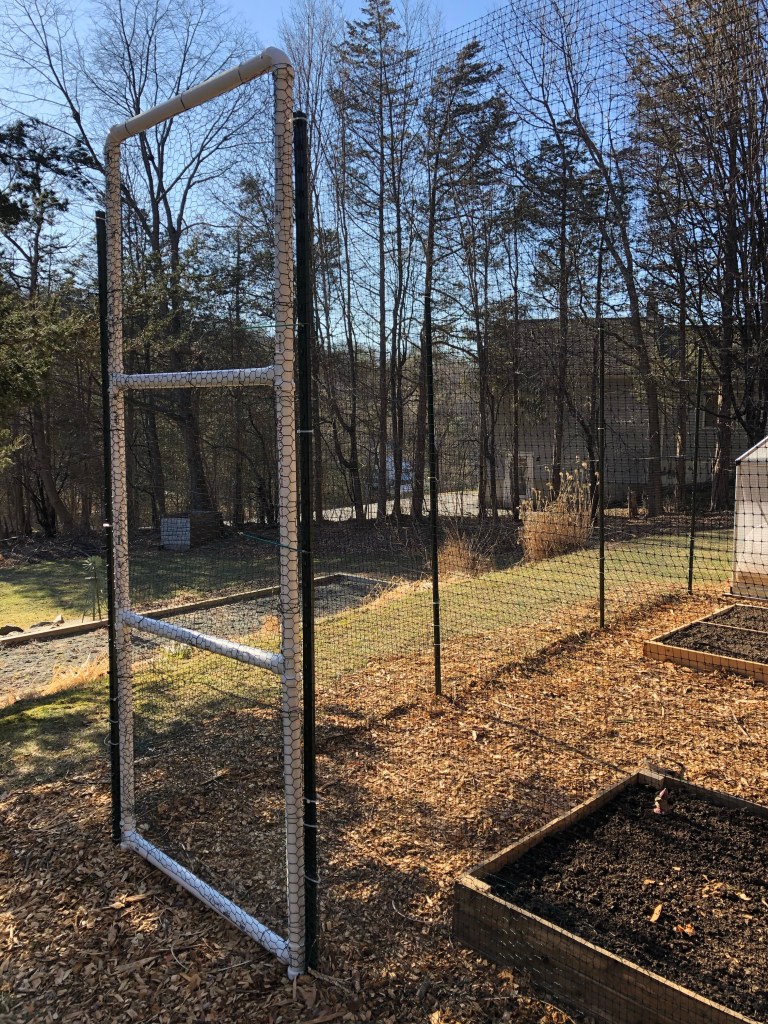
To prevent deer from entering, I put up a tall, yet cheap and simple deer fence. If it must be anything, it must be tall. Deer can easily clear a 6-foot tall fence while pirouetting backwards in their sleep. I’ve also heard that they can clear an 8-foot fence under extreme circumstances, like when frightened. For the fence, I used 10-foot T posts and tough deer netting. After pounding the posts into the ground, about 7 feet apart, the height of the fence was about 8.5 feet. Not unstoppable, but pretty good in my opinion. 

Lastly, I built a gate/door out of PVC pipe by connecting the pipes together with straight joints and 90-degree joints where needed. I then lined the gate with chicken wire. The gate opens and closes, as it pivots on a steel 5-foot rod. A couple climbing carabiners hold the gate shut. I may improve upon this system in the future, as it feels a bit improvised, yet not inconvenient.

The PVC Gate
Ready to garden

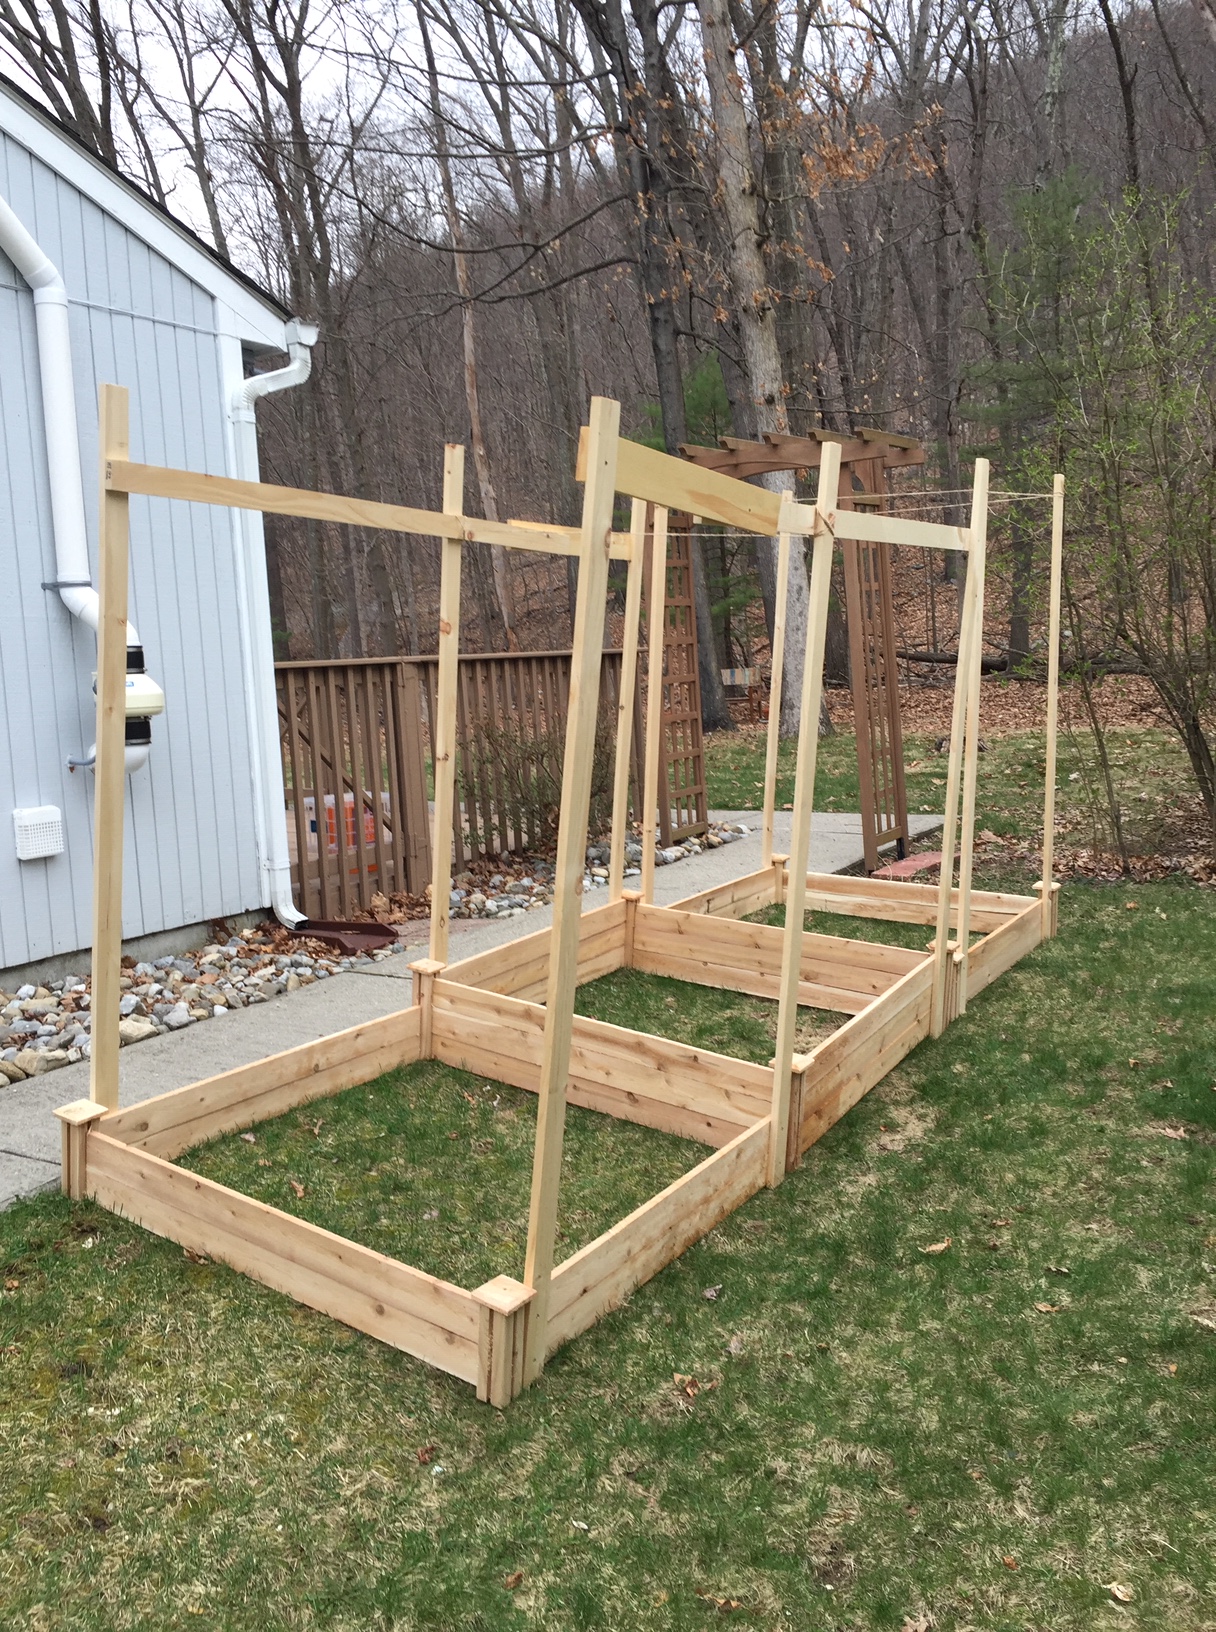
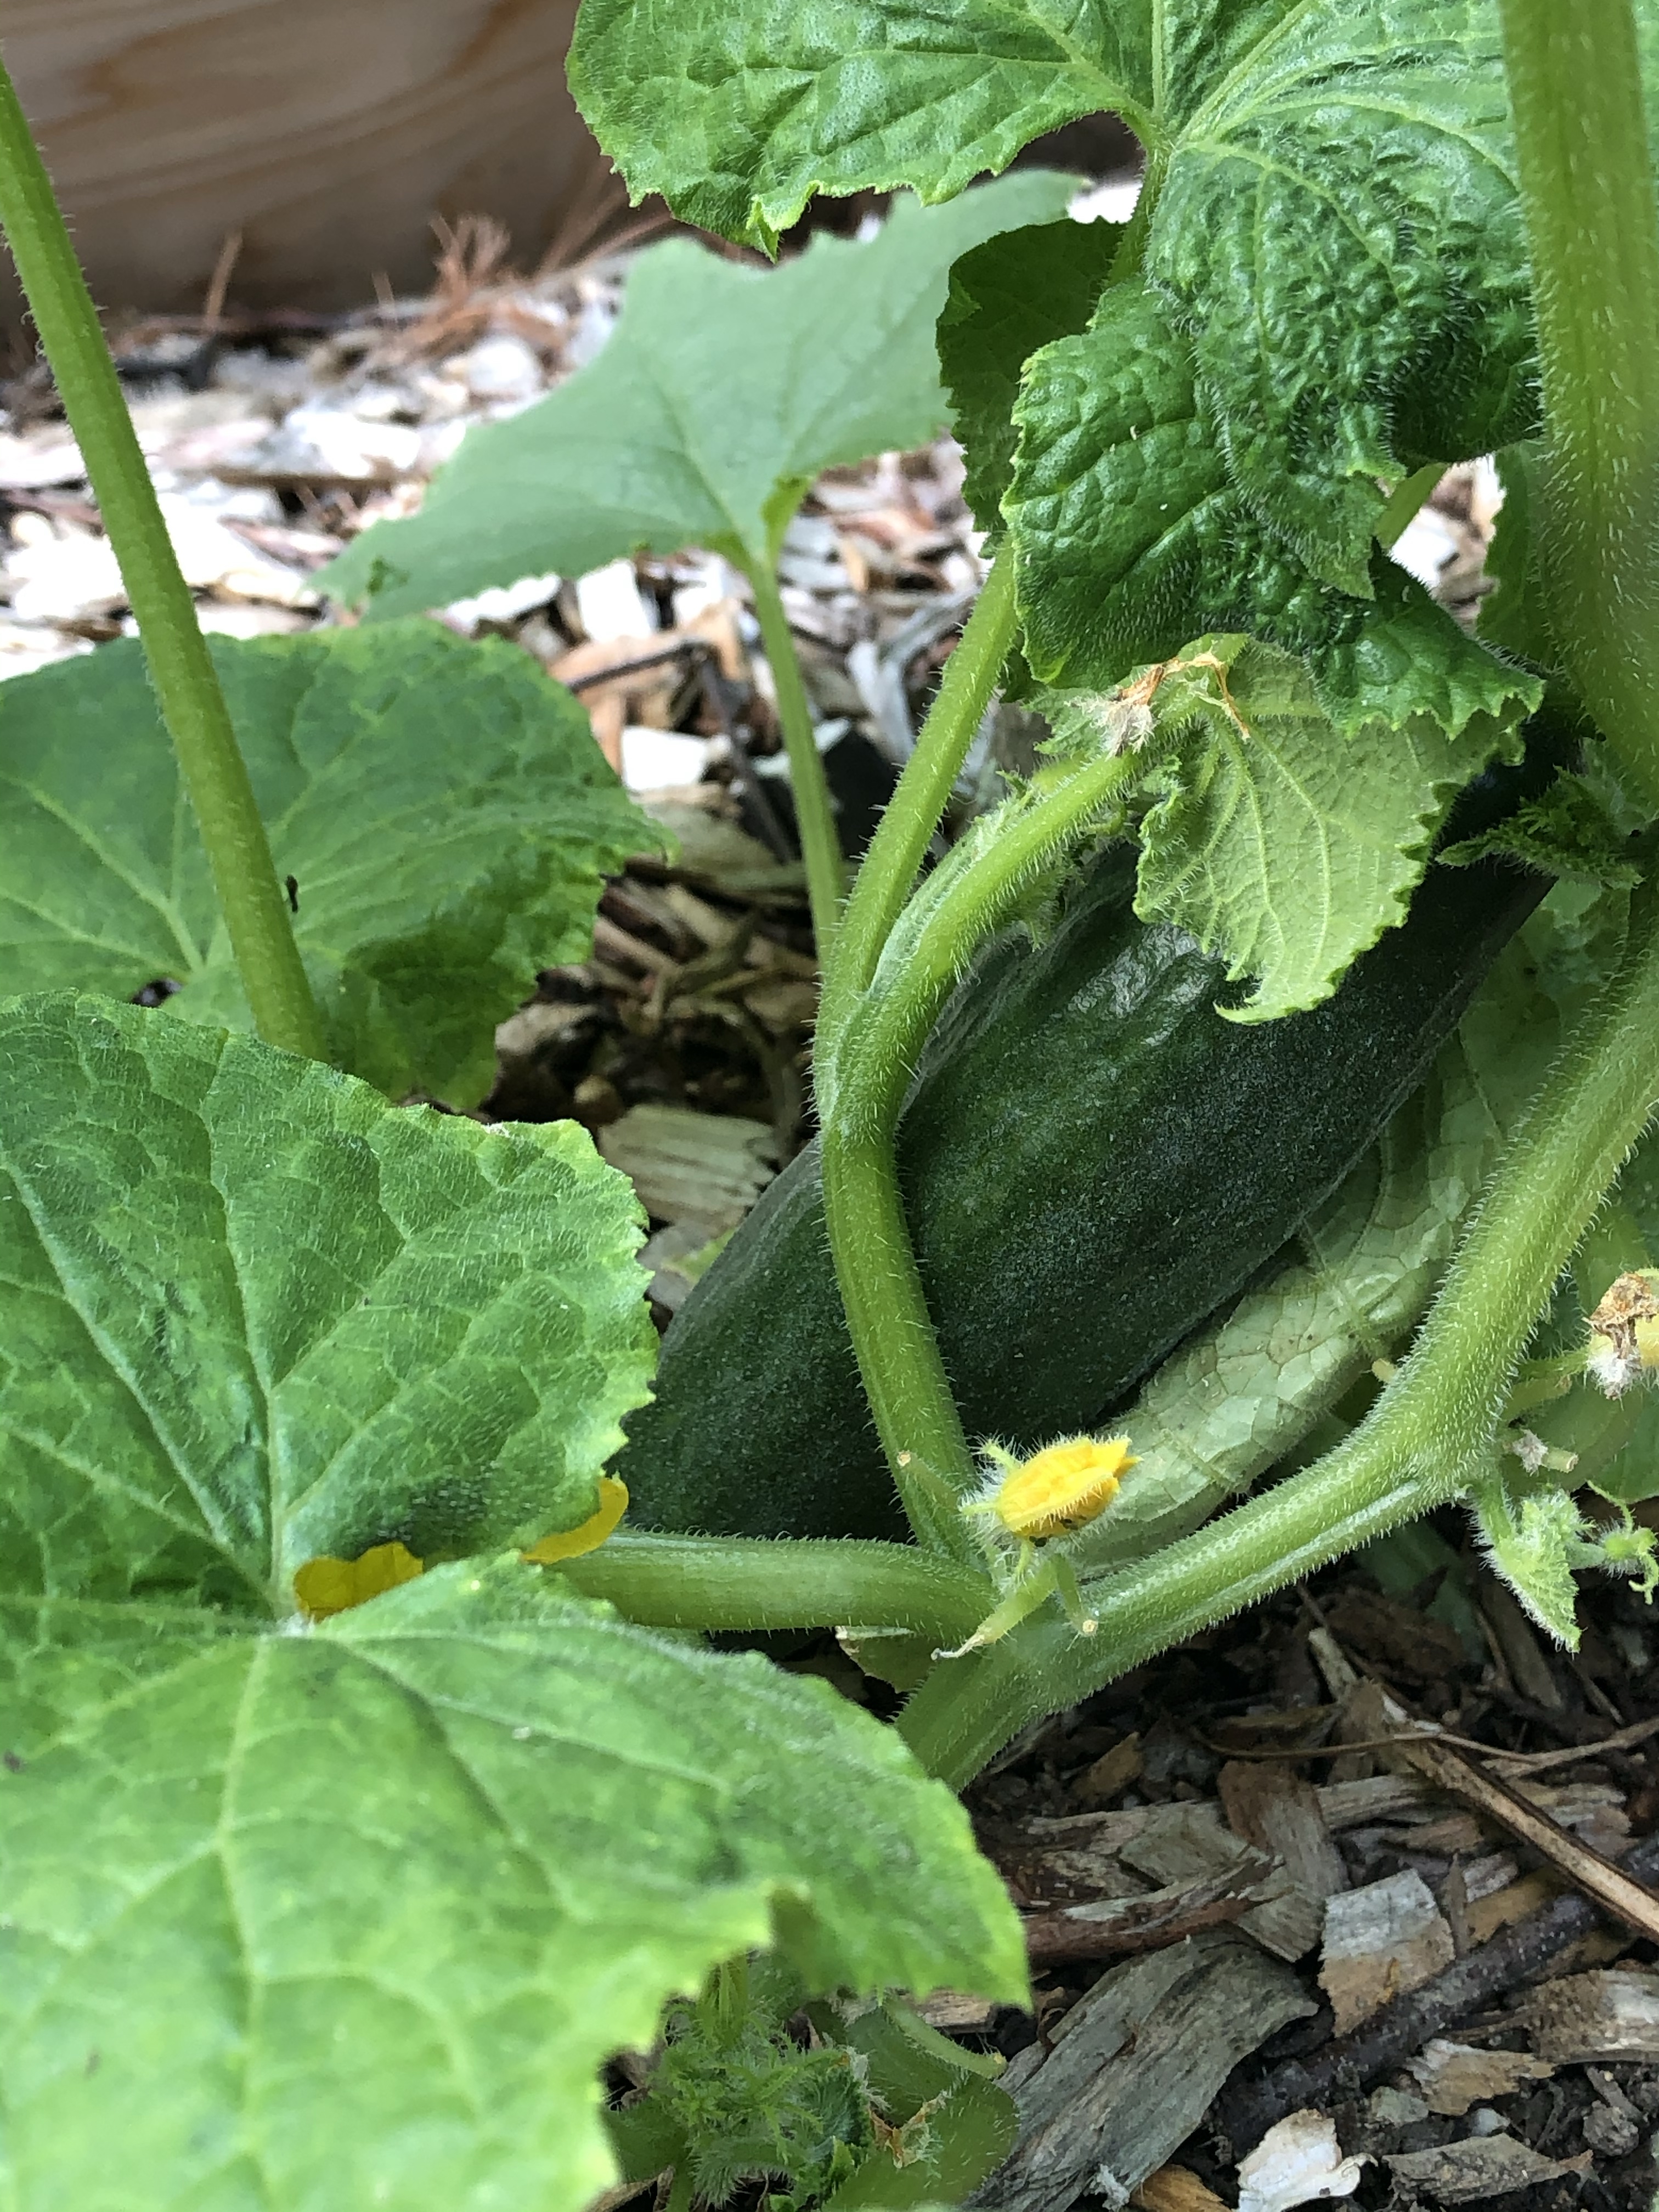
In the 1st year of this project, I built several raised beds and supplemented most of the remaining open space with large growbags. 3 out of 5 raised beds contain “teepee trellises” – a cost-free way to grow vegetable producing vines vertically by tying together 3 or 4 sturdy dead branches. In addition, I used twine to create little step ladders to help the plants climb. These beds would be used to grow cucumbers, pole beans, and butternut squash (I also snuck a few zucchini plants in there). The cucumbers were a big success, but I’m still not sure about the pole beans and butternut squash. I’ll make that call at the end of the season.

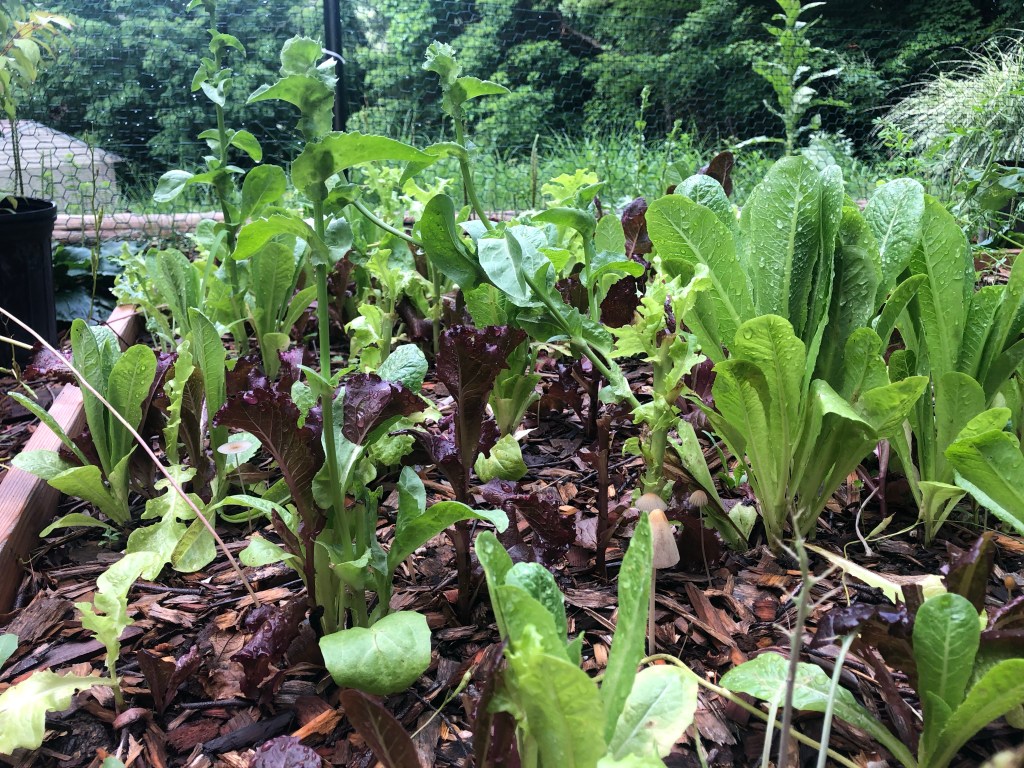
One of the other raised beds was used to grow several kinds of lettuces (Green and Red Salad Mix, 2 types of Romaine, and Tropicana), arugula, russian red kale, endive, broccoli, carrots, and beets. Not all at the same time, some in successional plantings. This too turned out to be successful (except for the broccoli). And my favorite and final raised bed was set aside for the strawberry. I say favorite because I don’t need to do anything to it, as these ever-bearing strawberries will keep coming back with more vigor year after year, without my intervention.

Starting to grow

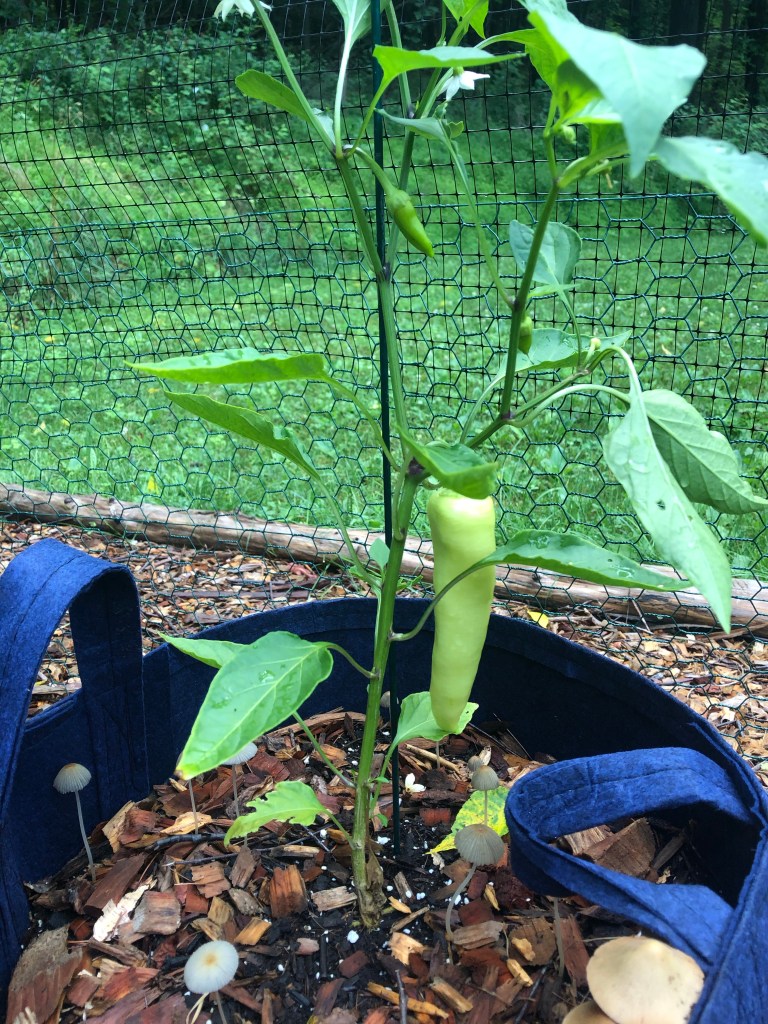
The 10-gallon and 20-gallon grow bags were reserved for 3 types of tomatoes (Cherry, Homestead, and Brandywine), all of which are indeterminate types (meaning they’ll keep growing and setting fruit until the frost kills them). The tomatoes got a late start due to a very cold May, but they did alight once they got going. Banana peppers lived in some of the other grow bags and they did quite well. Only 1 Bell pepper made it to maturity and is slowly making its way.

First Banana Pepper

Sweet potatoes, red potatoes, and white potatoes were planted in the remaining growbags. The Sweet potatoes seem to be doing quite well, but we will know for sure in the fall. I decided to harvest the regular potatoes because something completely devoured the plants. Luckily, I got a decent harvest anyway.

So, there we have it – more success than failure so far in a garden that was thrown together quickly during a mild winter. Next, I’d like to build some more raised beds and figure out a way to use the space more efficiently. I’m also thinking of growing blueberries and blackberries in this space. I have already been using the garden as a small nursery to grow plants for a native plant meadow project in our yard – another exciting project that will replace a bit of lawn with native plant habitat.

Gardening Failures

Gardening, plants

I am a newbie when it comes to growing food. I have had both success and failure gardening with native perennials but attempts to grow fruits and vegetables have mostly resulted in failure. In 2017, we owned a small house on a very shady 0.14 acres. I supposed we were doomed from the start, but we decided to experiment with growing vegetables anyway.

The south side of the house was shaded out by the neighbor’s large Pin Oak, and to the west we faced a 1480-foot mountain (Bearfort Mountain), which resulted in an early sunset. Stationing the raised beds on the east side if the house would have been more productive, but that was the front of the house where shrubs and various other plants were proudly displayed. The north side was our last resort, so we placed a few 4’x 4’ raised beds where the plants would receive a few hours of morning sun before the sun became hidden behind the house and trees.

IMG_2791

Before the fence. Did anyone bring a level?

IMG_2793

Rising stars

We started way too many seeds indoors and we had space for only 3 raised beds, so many of the seedlings had to be thinned out eventually. We put the beets, carrots, cucumbers, summer squash, tomatoes, peppers, and eggplant in the ground around Mother’s Day. The plants did grow, but they just did not get enough sunlight, which meant a very low yield for some plants like peppers and eggplant. The tomatoes developed slowly, and many remained green into the fall. We pulled them off before the frost killed them in hopes that they would ripen on a windowsill, but they weren’t that far along.

IMG_3106

Mildewy Squash. A trellis would have helped.

We harvested tiny carrots and beets, which did not develop well either due to due lack of sunlight (and probably insufficient soil depth). Some plants shaded out other plants due to the arrangement of the raised beds, but we had no choice due to property boundaries. The only good news was that we did not experience and major pest issues that year. At the end of this little experiment, we confirmed that that adequate sunlight and soil depth (depending on the crop) are essential. If we continued to live on that property, I think we would have used that same space to grow shade tolerant herbs or replace the beds with more shade-loving, deer resistant native perennials.

Today, in our new location, we are armed with more space, a greenhouse, and better light conditions. It is time to give the vegetable garden another shot. Mistakes will be made, from which I hope to learn and adjust what needs adjusting. Happy gardening!

Hobby Greenhouse

Gardening, plants

We have always dreamed about having a greenhouse. Build it out of wood and PVC pipe? I’d like to, but I’m not there yet. So, as a first time go at it, I decided to get a greenhouse kit, which included aluminum, plastic parts, and polycarbonate panels for assembly. We went with the Palram Mythos 6 x 14. At this time, it sold for around $1,000. Not too big, not too small, and most importantly – “not a permanent structure”!

IMG_8033

After a bit of research, I learned that a sturdy wood or concrete base is highly recommended. I have seen YouTube videos where people put up that same greenhouse without a base and it seemed functional. Without a base, you would need to make sure to anchor the greenhouse to the ground to prevent it from moving in inclement weather. Also, the ground must be perfectly level to avoid assembly issues.

For my base, I used 4″x 4″ untreated cedar. Cedar is a naturally rot-resistant wood, which makes it a great choice for outdoor projects. Of course, it will rot after a few years, so I’ll need to replace the base eventually. I hear pressure treated wood is fine too because they no longer use arsenic, but I didn’t want to take the chance.

For site preparation and base construction, I used this tutorial from ACF Greenhouses for general reference and modified as needed. Before constructing the wood base, I leveled out a roughly 8’ x 16’ area using a hand-tiller (to remove the grass), hard rake, and tamper. Next, I laid down a weed barrier where I planned to put the base. I cut the cedar wood to fit a 6’ x 14’ greenhouse by making a couple of 45° angle cuts to connect pieces in the middle where needed. The corners of the base were connected using a ratchet wrench and 8” lag screws. Plenty of mistakes were made along the way!

Time to assemble the greenhouse! Warning: there is (at the time I am writing this) a typo on the front page of the Palram Mythos instruction manual where it indicates greenhouse dimensions in inches for the 6’ x 14’ model (the inches do not equal the feet specified). You can imagine the rage when I thought I had to redo the base and the relief when I realized they had made a boo-boo.

IMG_8009

IMG_8012 (1)

It took about 15 hours to put up the greenhouse by myself, but I’m not very swift. If assembling by yourself, I find the hardest part is getting the long sides of the greenhouse to stay upright until the cross-bar is installed at the top to secure each side. I used a wheel-barrow and some chairs on the outside and inside of each side to hold it up until I installed the cross-bars. Generally, the greenhouse assembly for this model is pretty good, no major headaches.

IMG_8020

IMG_8018

I had also purchased an anchor kit to secure the greenhouse to the ground, but I realized I did not need it, so I returned it. Instead, I secured the greenhouse to the wood base with wood screws. Shortly after, we had 45 mph winds overnight and it did not budge. I only had to re-adjust one of the roof panels that became slightly displaced.

We then got 13 inches of snow, including a 2-inch-thick layer of ice. The greenhouse held up nicely through it all. I went out to clean the snow off the roof a few times just in case, and to let light in, but the ice remained until it melted. I plan to use the greenhouse to get a head start on sowing seeds for spring and to grow cold hardy crops like kale and spinach for late fall and winter harvest!